AI Portraits Are Getting Scarily Good (Here’s How to Use That)
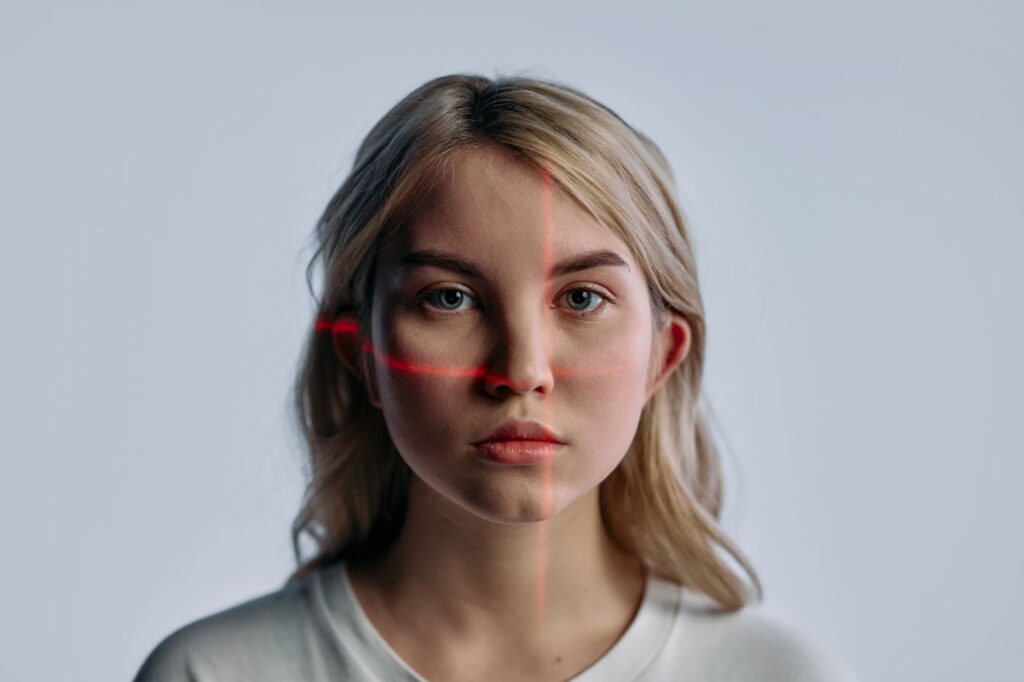
A few years ago, AI-generated faces looked like fever dreams: melted ears, extra fingers, eyes pointing in different directions. Now? Some of the best AI headshots are indistinguishable from a professional studio shoot. If you haven’t experimented with creating ai portraits yet, you’re missing out on a genuinely useful tool.
Whether you want a polished LinkedIn headshot without booking a photographer, a consistent profile image for your brand, or just want to experiment with creative portrait styles, the tools available right now are remarkable. This guide walks you through how to actually do it, not just which apps exist, but how to get results that look intentional and professional.
Understanding What “AI Portrait Generation” Actually Means
There are two different things people usually mean when they talk about ai face generation. The first is generating a portrait from scratch, where the AI invents a person who doesn’t exist. The second is using your own photos as a reference to produce a stylized or enhanced version of your actual face. These are very different processes, and the tools that handle them well aren’t always the same.
If you need ai profile photos that actually look like you (for LinkedIn, a website bio, or professional use), you’ll want tools that accept reference images and fine-tune on your likeness. If you’re creating fictional characters, brand mascots, or stock-style portraits, generative tools without reference input work great.
The distinction matters because it changes which platform you should use, how you set up your prompts, and how much control you’ll have over the final output. Picking the wrong type of tool is the most common reason people end up disappointed with their results.
The Best Tools for Creating AI Headshots Right Now
The landscape changes fast, but as of now there are a handful of platforms that consistently produce strong results for ai headshots and portrait work.
Midjourney
Midjourney is probably the most popular option for high-quality portrait generation from scratch. It produces stunning, painterly or photorealistic faces depending on how you prompt it. The catch is that it doesn’t natively fine-tune on your specific face, so it’s better for creative portraits and fictional characters than for personal headshots. You’ll need to use it through Discord or the newer web interface, and it requires a paid subscription starting around $10 per month.
Stable Diffusion with LoRA Fine-Tuning
This is the power-user option. Stable Diffusion is open-source and free to run locally (if you have a decent GPU), and with LoRA (Low-Rank Adaptation) models you can train the AI on your own face using as few as 10 to 20 photos. The results can be genuinely amazing. It’s more technical to set up, but platforms like Automatic1111 or ComfyUI make the workflow manageable if you’re willing to spend a couple of hours learning the interface.
Dedicated Headshot Apps: HeadshotPro, Aragon, and Try It On AI
These platforms are built specifically to create portrait ai results from your uploaded photos. You upload a batch of selfies (usually 10 to 20), pay a flat fee (typically $25 to $50), and they return a set of polished headshots in different styles, backgrounds, and outfits. The quality varies, but services like HeadshotPro and Aragon have strong track records. For people who don’t want to touch any technical settings, this is the most practical path.
Adobe Firefly and Portrait Features in Photoshop
Adobe has been aggressively integrating AI into its suite. Firefly can generate portraits, and Photoshop’s generative fill lets you swap backgrounds, change outfits, or extend images around a face. It’s not a standalone headshot generator, but it’s excellent for post-processing AI portraits or touching up real photos in ways that used to take hours.
How to Write Prompts That Actually Get Good Portraits
Prompt writing is where most beginners go wrong. Vague prompts produce vague results. “A professional headshot of a woman” will give you something generic. Specificity is everything when you want to create portrait ai output that looks polished.
Here’s a structure that works consistently for photorealistic headshots:
- Subject description: Age range, gender, hair color and style, any specific features you want
- Lighting: Soft studio lighting, natural window light, golden hour, etc.
- Background: Plain white, blurred office, outdoor bokeh, solid neutral gray
- Style and mood: Professional, approachable, editorial, corporate, creative
- Technical specs: Shot on 85mm lens, shallow depth of field, sharp focus on eyes
- Quality tags (for Midjourney or SD): Photorealistic, 8K, hyperdetailed, award-winning photography
An example prompt that works well in Midjourney: “Professional headshot of a 35-year-old woman with dark wavy hair, soft studio lighting, neutral gray background, warm and approachable expression, shot on 85mm lens, shallow depth of field, sharp eyes, photorealistic, 8K resolution.” That level of detail consistently beats generic prompts by a wide margin.
Negative prompts matter too. In Stable Diffusion especially, tell the model what to avoid: “blurry, distorted face, extra limbs, watermark, bad teeth, asymmetrical eyes, overexposed.” This alone can clean up a huge percentage of the weirdness that shows up in AI portraits.
Getting Your Own Face Into AI Portraits
This is where things get really interesting, and a bit more involved. If you want ai profile photos that look like the actual you, not a generically attractive AI face, you have a few options.
The dedicated apps (HeadshotPro, Aragon, etc.) do this automatically. You upload your photos, they fine-tune a model on your face, and you get results back. Simple, but you’re paying for the convenience and accepting some limitations on style control.
For more control, Stable Diffusion with Dreambooth or LoRA training is the route. Here’s the basic process:
- Gather 15 to 25 photos of your face with varied lighting, angles, and expressions
- Crop them tightly to just your face and upper shoulders
- Use a training tool (Kohya_ss is a popular option) to train a LoRA on your images for roughly 1,000 to 2,000 steps
- Load your trained LoRA into Stable Diffusion and use it in combination with portrait-focused base models like Realistic Vision or epiCRealism
- Generate with the same prompt structure outlined above, referencing your LoRA trigger word
The whole training process takes about 20 to 40 minutes on a modern GPU. Once it’s done, you can generate unlimited portraits in any style, lighting, or setting you want. It’s genuinely one of the most powerful things you can do with ai face generation technology right now.
Common Problems and How to Fix Them
Even with good tools and solid prompts, you’ll run into issues. Here are the ones that come up most often and what to do about them.
The Face Looks Uncanny or Slightly Off
This usually happens when the model is stretching beyond its training distribution, maybe an unusual angle, an extreme expression, or a lighting setup it hasn’t seen much of. Try simplifying: stick to a straight-on 3/4 angle, neutral expression, even lighting. Once you nail a base result, you can push into more interesting territory.
The Likeness Isn’t Accurate Enough
If you’re using a LoRA or fine-tuned model and the results don’t really look like you, the most common culprit is low-quality or low-variety training images. Retrain with better photos: sharp focus, different lighting angles, no sunglasses, no heavy filters. Also try increasing your LoRA weight in the prompt (typically a value between 0.6 and 0.9 works well).
The Background or Clothing Looks Fake
AI portraits often nail the face and botch everything else. One solid workaround is generating the face at high quality, then using inpainting or a tool like Adobe Firefly to regenerate the background separately. Photoshop’s generative fill handles this beautifully and takes about 30 seconds.
The Image Looks Too “AI”
If the result reads as obviously artificial, check a few things. Lighting should have clear directionality, not the flat even glow that AI defaults to. Skin texture matters a lot: use prompts that emphasize realistic skin pores and texture. And small imperfections actually help. Slightly asymmetrical features, a subtle catch-light in the eyes, a bit of hair out of place. These details make portraits feel real.
Legal and Ethical Stuff Worth Knowing
Using AI to generate your own portrait for professional use is pretty straightforward and generally uncontroversial. But there are a few things to keep in mind if you’re going broader than that.
Don’t generate realistic portraits of real, identifiable people without their consent. Most platforms explicitly prohibit this in their terms of service, and in some jurisdictions it’s becoming legally murky territory. If you’re creating fictional faces for commercial use, check the licensing terms of whatever platform or model you’re using. Midjourney’s commercial rights depend on your subscription tier. Stable Diffusion outputs using certain base models may have restrictions. It’s worth reading the fine print before you publish or sell anything.
For ai headshots used in professional contexts, transparency is becoming increasingly expected. Some platforms and communities now ask users to disclose when a profile photo is AI-generated. It’s a reasonable norm, and being upfront about it avoids awkward situations later.
From Experiment to Professional Output
The gap between “I generated a cool face” and “I have a professional headshot I can use everywhere” comes down to iteration and post-processing. Rarely does the first generation nail everything. Expect to run 10 to 30 variations, adjust your prompt, tweak settings, and then do a small amount of touch-up in Photoshop or Lightroom to get the final image where you want it.
That said, once you develop a workflow that works, it gets fast. Many people now have a reliable system that produces a new professional ai portrait in under 20 minutes. For solo founders, freelancers, content creators, and anyone who needs regular updated profile photos, that’s a genuinely valuable capability.
Start with one of the dedicated headshot apps if you want results today with zero learning curve. If you want full creative control and plan to generate portraits regularly, invest the time to set up Stable Diffusion with LoRA training. Either way, there’s no reason to be stuck with a blurry bathroom selfie as your professional photo when these tools are this accessible. Pick a platform, follow the prompt structure above, and start generating.