Why Manual Subtitling Is Costing You More Than You Think
You spent three hours filming a video, another two editing it, and now you’re staring down the barrel of transcribing every spoken word by hand. There’s a better way, and it’s already being used by creators, marketers, and media teams who’ve quietly cut their subtitle workflow from days to minutes.
AI video subtitles have moved well past the clunky auto-captions era that used to turn “specifically” into “pacific lee” and make your perfectly coherent interview sound like a fever dream. Modern AI transcription tools are genuinely impressive. They can handle accents, technical jargon, overlapping dialogue, and multiple languages with accuracy rates that routinely hit 95% or higher on clean audio. If you’re still doing this manually, or outsourcing it at $1.50 per minute, you’re leaving serious time and money on the table.
This guide walks you through exactly how to use AI to automatically create video subtitles, which tools are worth your attention, and how to get clean results even when your source audio isn’t perfect.
How AI Subtitle Generation Actually Works
It helps to understand what’s happening under the hood, because it explains why some tools outperform others and why audio quality matters so much.
Most modern subtitle generator AI tools are built on automatic speech recognition (ASR) models. OpenAI’s Whisper model, released publicly in 2022, became a turning point for the industry. It was trained on 680,000 hours of multilingual audio scraped from the internet, which means it learned to handle real-world speech patterns rather than the clean studio recordings that earlier ASR systems relied on. Many of today’s best AI captioning tools either use Whisper directly or have built their own comparable models.
The process follows a predictable sequence. The tool ingests your video file, separates the audio track, breaks it into small segments, runs each segment through the speech recognition model, generates a text transcript with timestamps, and then packages everything into a subtitle format like SRT or VTT. The whole thing can happen in roughly the same time it takes to make a cup of coffee.
What separates a good AI transcribe video subtitles experience from a frustrating one comes down to three things: the quality of the underlying model, how well the tool handles speaker diarization (identifying who’s speaking), and how easy it is to edit mistakes afterward.
The Best AI Tools for Automatic Subtitles Right Now
There are dozens of tools in this space, but a handful consistently rise to the top based on accuracy, speed, and practical usability.
Descript
Descript treats your video like a text document. Once you upload footage, it generates a full transcript and lets you edit the video by editing the words. Delete a sentence from the transcript and Descript removes that clip from the video. For creators who want ai captions automatic as part of a broader editing workflow rather than a standalone step, it’s one of the most seamlessly integrated options available. Pricing starts around $12 per month for the Creator plan.
Submagic
Submagic has carved out a niche specifically with short-form content creators. It’s built for TikTok, Instagram Reels, and YouTube Shorts, automatically adding animated, styled captions that match the aesthetic these platforms reward. The AI handles transcription and formatting in one step, and the results look like something you’d spend an hour styling manually in Premiere Pro. If your content lives on vertical video platforms, Submagic is worth a serious look.
Kapwing
Kapwing is a browser-based video editor with strong auto subtitle AI functionality built in. It supports over 70 languages, handles files up to several gigabytes, and produces clean SRT exports. The free tier is generous enough for occasional use, and the Pro plan at around $16 per month removes watermarks and expands storage. It’s a solid all-around choice for teams that need collaborative access without installing anything.
Adobe Premiere Pro (with Captions)
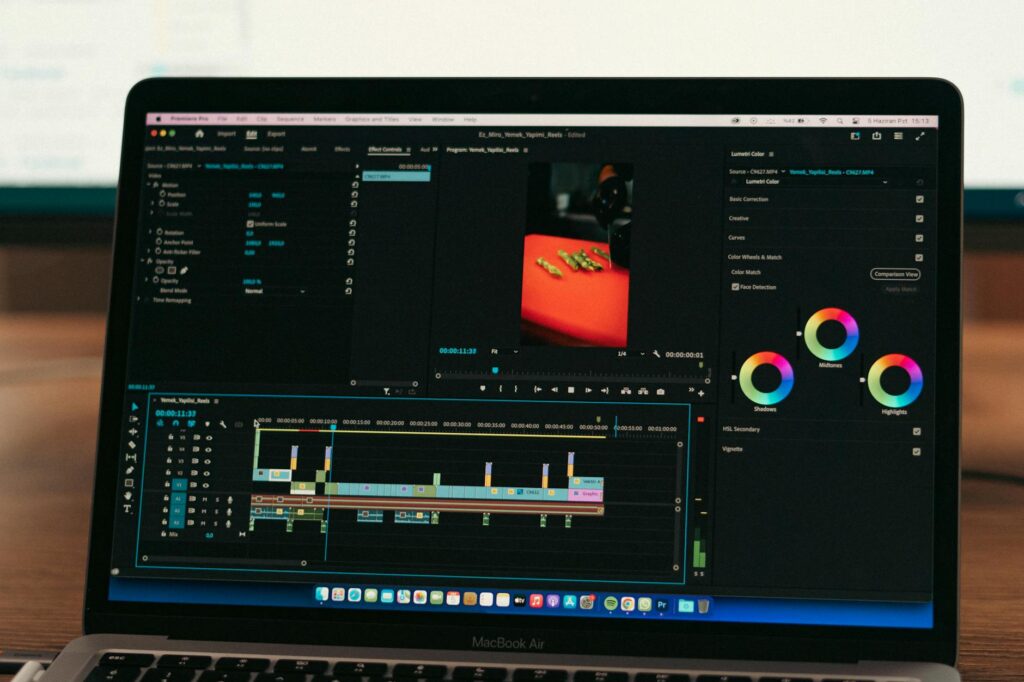
If you’re already inside Adobe’s ecosystem, Premiere Pro’s built-in speech-to-text feature uses Adobe Sensei to generate captions directly in your timeline. It’s not the most accurate tool in this comparison, but the integration advantage is real. You can generate, style, and burn captions into your export without leaving the application. For professional editors who already pay for Creative Cloud, it costs nothing extra to use.
ElevenLabs Dubbing Studio
Better known for voice synthesis, ElevenLabs has expanded into video with a dubbing and subtitle tool that handles transcription with impressive accuracy. It also supports translated subtitles in multiple languages from a single upload, which makes it useful for creators targeting international audiences.
Step-by-Step: Creating AI Subtitles with a Free Tool
Let’s walk through a practical workflow using Kapwing, since it’s free to start and browser-based, meaning you don’t need to install anything or have a powerful local machine.
Step 1: Upload your video. Go to kapwing.com, create a free account, and click “Start Editing.” Upload your video file directly from your computer or paste a URL from YouTube or another platform. Kapwing accepts most common formats including MP4, MOV, AVI, and MKV.
Step 2: Navigate to the Subtitles tool. Once your video loads in the editor, look for the “Subtitles” option in the left sidebar. Click it and select “Auto-Generate.” Choose your video’s spoken language from the dropdown menu.
Step 3: Wait for processing. Kapwing processes your audio through its AI model. For a ten-minute video, expect roughly two to four minutes of processing time depending on server load. You’ll see a progress indicator.
Step 4: Review and edit the transcript. This step is non-negotiable if accuracy matters. Even the best AI transcribe video subtitles tools make mistakes, especially with proper nouns, brand names, technical terms, or heavy accents. Read through the generated text alongside your video and correct errors inline. Kapwing’s editor lets you click directly on any word to fix it.
Step 5: Style your captions. Adjust font, size, color, and positioning. For social content, high-contrast text with a subtle background or stroke tends to perform best for readability. For documentary or corporate content, a clean lower-third placement usually suits better.
Step 6: Export. Export your video with captions burned in, or download the SRT file separately if you’re uploading to a platform like YouTube that handles captions in a separate track.
Getting Cleaner Results: Audio Quality and What to Do About It
Here’s the uncomfortable truth that no tool vendor wants to lead with: garbage audio produces garbage subtitles, no matter how sophisticated the AI. A video recorded in a noisy environment with a laptop microphone will consistently produce worse results than one recorded with even a basic lapel mic in a quiet room.
If your source audio is rough, a few approaches can help before you run it through a subtitle generator AI.
- Use Adobe Podcast Enhance (free): Adobe’s web-based audio enhancement tool uses AI to remove background noise and improve vocal clarity. Upload your audio or video, let it process, and download a cleaner version before running subtitle generation.
- Try Auphonic: Another AI audio cleanup tool that handles noise reduction, leveling, and filtering. The free tier covers two hours per month, which is plenty for occasional use.
- Record a scratch track: If you’re doing a screen recording or tutorial where the original audio is poor, record a clean voice-over version and let the AI transcribe that instead.
Speaker diarization is the other common pain point. If your video features multiple speakers, most tools will transcribe everything accurately but label it all under a single speaker. Tools like Descript and AssemblyAI offer better multi-speaker detection, automatically assigning different speakers to different labels, which matters a lot for interview content or panel discussions.
Platform-Specific Considerations That Most Guides Skip
Not all subtitle workflows are the same, and where your video ultimately lives changes which approach makes the most sense.
YouTube has its own auto-caption system, and while it’s improved considerably, it still trails dedicated ai captions automatic tools in accuracy and doesn’t give you control over styling. Uploading a manually corrected SRT file is almost always worth the five extra minutes. YouTube’s algorithm also indexes subtitle text for search, so accurate captions directly improve your video’s discoverability.
LinkedIn video captions are often overlooked, but roughly 80% of LinkedIn video is watched without sound in professional environments. Burned-in captions aren’t optional on this platform, they’re essential. The same logic applies to Facebook and Instagram, where default playback is muted in-feed.
For broadcast or streaming content, delivery specifications often require a specific subtitle format like TTML or SCC rather than the more common SRT. Most professional tools support format conversion, but it’s worth checking before you get deep into a workflow.
If you’re creating content for multiple languages, some AI subtitle tools now offer translation as part of the same pipeline. Upload once, generate subtitles in English, and then translate to Spanish, French, or Japanese with a single click. The translation quality isn’t perfect and always warrants a native-speaker review, but it cuts the initial workload dramatically.
Make Subtitling a Habit, Not an Afterthought
The creators and production teams getting the most out of ai video subtitles aren’t treating it as a finishing step. They’re building it into the workflow from the start, choosing tools that integrate with their editing software, batching subtitle jobs alongside exports, and keeping a style guide for caption formatting so every video looks consistent.
Start with one tool today, Kapwing if you want free and fast, Descript if you want editorial power, Submagic if you create short-form social content, and run your next video through it. Check the accuracy, adjust for your specific vocabulary or subject matter, and then decide whether a paid tier is worth it based on your actual volume. The difference between a subtitle workflow that takes twenty minutes and one that takes two hours is simply which tool you’re using and whether you’ve set it up properly. Pick one, learn it, and stop transcribing by hand.