Your Footage Looks Flat. Here’s How AI Fixes That Fast
Bad color grading can kill a video before the viewer even processes what they’re watching. The good news is that AI color correction video tools have gotten genuinely impressive, and you don’t need years of post-production experience to use them well.
Whether you’re a YouTuber dealing with inconsistent iPhone footage, a wedding videographer juggling 12 different lighting scenarios, or a filmmaker trying to speed up your workflow, AI-powered color tools can cut your editing time dramatically while producing results that look professional. This guide walks you through exactly how to use them, what to expect, and which tools are actually worth your time.
What AI Color Correction Actually Does (and Doesn’t Do)
Let’s be clear about something: AI doesn’t magically transform garbage footage into cinema. What it does is analyze your video frame by frame, identify exposure problems, color casts, white balance issues, and tonal inconsistencies, then apply intelligent corrections based on trained data from thousands (sometimes millions) of reference clips.
Most AI video improvement tools use one of two approaches. The first is scene-based analysis, where the system looks at the overall mood and content of the shot and applies a correction style based on what it “thinks” the footage should look like. The second is reference-based matching, where you feed the AI a target image or clip and it adjusts your footage to match that color profile.
Both approaches work, but they work differently depending on your footage. Outdoor daytime shots with natural light respond incredibly well to AI auto-correction. Indoor mixed lighting, especially anything shot under fluorescent bulbs with a window in the background, tends to need more manual tweaking even after the AI takes a pass.
Understanding this upfront saves you frustration. Think of AI as a very fast, very smart first draft. You still review it. You still adjust. But instead of starting from a flat, desaturated LOG file and building everything from scratch, you’re starting at maybe 75-80% of the way there.
The Best AI Tools for Color Grading Video Right Now
DaVinci Resolve’s Magic Mask and Color AI
DaVinci Resolve is free for most users, and its AI color tools are genuinely best-in-class. The Color AI feature (found in the Color page) lets you use automatic scene analysis to get a baseline grade applied across your timeline in seconds. The Magic Mask tool uses AI to isolate subjects like a specific person’s face or skin, so you can color grade ai elements selectively without rotoscoping by hand.
For a practical workflow: import your raw or LOG footage, use the Color AI to set a neutral starting point, then use the qualifier tools with Magic Mask to isolate skin tones and adjust them separately from the background. This two-step process alone can take a talking-head YouTube video from looking washed out to looking like it was shot on a proper studio setup.
Topaz Video AI
Topaz is more focused on enhance video AI tasks like upscaling and noise reduction than traditional color grading, but it plays a supporting role in color work. When you upscale footage from 1080p to 4K using Topaz’s temporal AI engine, the process also sharpens color edges and reduces the muddy compression artifacts that make colors look dull. The result is footage that looks cleaner and more vivid without a single adjustment to your color wheels.
It’s not cheap at around $299, but for videographers shooting in lower-resolution formats who need broadcast or streaming quality, the output is hard to argue with.
Adobe Premiere Pro’s Auto Color and Lumetri AI Features
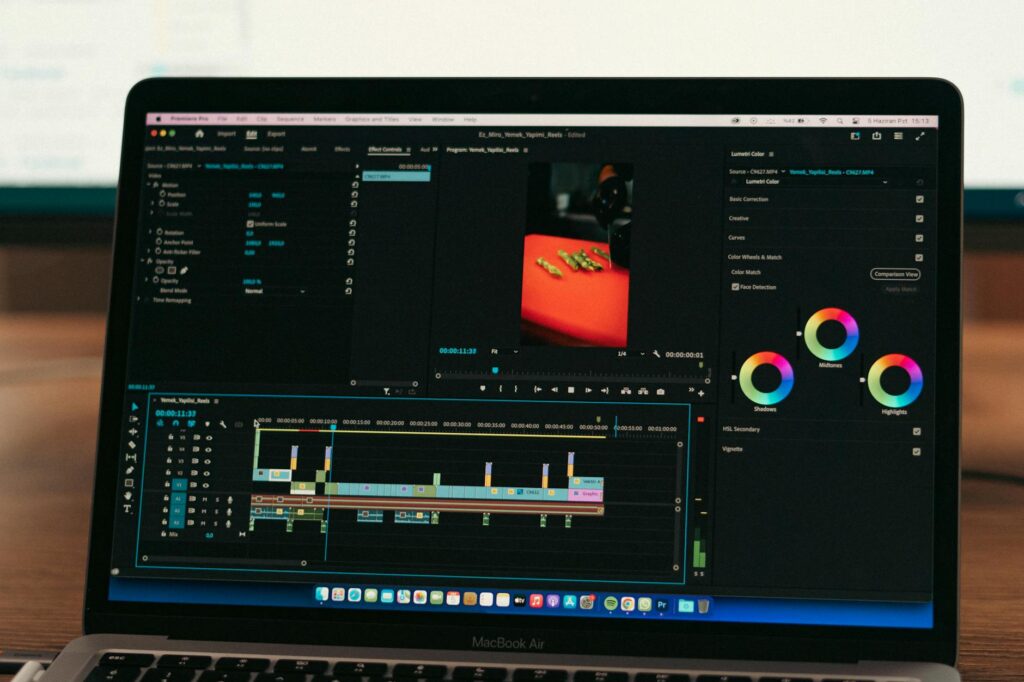
Premiere has rolled out AI-assisted color tools under its Sensei AI framework. The Auto Color button in Lumetri Color applies a machine-learning correction to your clip with a single click. It’s less powerful than DaVinci’s approach, but it’s built right into an editing timeline most people are already using, which matters for speed.
The Shot Matcher feature is where Premiere gets genuinely useful. You select a reference frame from one clip, then apply that color profile to other clips in your sequence. For multicam shoots or footage gathered across multiple days, this cuts down color matching time from hours to minutes.
Runway ML
Runway is more experimental, but it’s worth knowing about. Its video-to-video AI tools can apply stylistic color looks to entire clips based on text prompts or reference images. It’s not replacing DaVinci for precision work, but for social content where you want a specific aesthetic fast, like a “golden hour film” look on footage shot at noon, it’s surprisingly capable. The ai video quality output isn’t always consistent shot to shot, so use it for shorter clips rather than full projects.
A Step-by-Step Workflow for AI-Assisted Color Correction
Here’s a practical process you can start using today. This assumes you’re working in DaVinci Resolve, but the logic applies to most professional tools.
- Step 1: Normalize first. Before any AI correction, set your white balance and exposure manually. Drag your clips into the timeline, open the Color page, and use the parade scope to make sure your blacks are sitting around 0 and your whites aren’t clipping. AI tools perform much better when they’re starting from reasonably balanced footage.
- Step 2: Apply Color AI analysis. Right-click a clip and select “Auto Color.” Resolve’s AI will apply a correction based on its analysis of the shot. Review it on the scopes, not just by eye.
- Step 3: Copy grade to similar shots. Once you have a correction you’re happy with, use the “Apply Grade” feature to push that look to clips shot under similar conditions. The AI handles the per-clip micro-adjustments while keeping your overall look consistent.
- Step 4: Use Magic Mask for skin and sky. These two elements are where most videos live or die visually. Isolate faces and adjust luminance and saturation independently. Do the same for sky if it’s overexposed.
- Step 5: Run through Topaz if needed. If you’re delivering at 4K but shot at 1080p, export your color-graded timeline, run it through Topaz Video AI for upscaling, then deliver the final file. The sharper, cleaner output makes your color work look even better.
This five-step process isn’t quick the first time you do it. But once you’ve built the habit, you can move through a 10-minute video in under 90 minutes, which is a significant improvement over traditional grading workflows that can stretch across a full day.
Common Mistakes People Make with AI Color Tools
Trusting the Preview Monitor Instead of the Scopes
AI corrections look great on your monitor. The problem is your monitor might be too bright, too warm, or running in a non-calibrated color space. Always use waveform scopes and vectorscopes to verify what the AI has actually done to your image. A clip that looks perfect on your laptop screen might be completely blown out on a calibrated reference display.
Applying the Same Correction to Every Clip
This is a shortcut that creates a problem. AI color correction video tools are designed to analyze individual clips. If you apply one correction to 50 different clips without letting the AI assess each one, you’ll get a grade that looks okay on some shots and wrong on most of them. Take the extra time to let the tool do its per-clip analysis.
Skipping the Manual Review Step
AI is fast but it makes assumptions. If your footage has an actor wearing a red jacket in front of a red wall, the AI might treat the entire frame as a red-dominant scene and overcorrect in ways that shift skin tones. Always scrub through your timeline after AI correction and look for shots where the tool made a clearly wrong call. They exist, and catching them is your job.
How AI Video Enhancement Improves More Than Just Color
Color is the most obvious application, but AI video improvement tools are also tackling related visual problems that color correction alone can’t fix.
Noise reduction is a big one. Footage shot at ISO 3200 or higher has grain and digital noise that muddies color significantly. Tools like Neat Video and the AI noise reduction built into DaVinci Resolve can clean up that noise while preserving detail, which makes color grading much more effective afterward. You’re not fighting the grain when you’re trying to dial in a subtle teal-and-orange look.
Stabilization also interacts with color. Shaky footage with lots of motion blur creates frames where colors blend and shift in ways that AI color tools struggle to correct consistently. Running stabilization first, whether through Resolve’s built-in stabilizer or a dedicated tool like ProDAD Mercalli, gives the AI cleaner frames to work with.
Temporal consistency is another area where AI shines. Traditional color grading struggles with flickering, where the color and exposure shift subtly between frames in handheld or poorly-lit footage. AI tools can now analyze frame sequences and smooth out those inconsistencies automatically, something that used to require expensive, time-consuming manual keyframing.
Getting the Most Out of AI Without Losing Your Creative Vision
There’s a real risk with any automated tool: homogenization. If everyone uses the same AI color grading tools with the same default settings, content starts to look the same. The most effective approach is to use AI for the technical heavy lifting while keeping creative decisions in your hands.
Use AI to fix what’s broken. Use your own eye to shape the mood. A good workflow looks like this: AI handles exposure normalization, white balance correction, and skin tone consistency. You handle the creative grade, the color story, the choices about whether this scene feels warm and nostalgic or cold and tense. Color grade AI tools are powerful assistants, not directors.
If you’re just getting started, pick one tool, either DaVinci Resolve if you want the most powerful free option, or Premiere Pro if you’re already in the Adobe ecosystem, and spend two weeks using it on real projects. Don’t jump between tools trying to find the perfect one. The fastest way to improve your AI-assisted color work is repetition on actual footage, not tutorials about tutorials.
Start with your next project. Open Resolve, hit Auto Color, and see what the AI gives you. Then make it better. That gap between what the AI produces and what you turn it into is exactly where your skills grow.